
Rubber hoses are standard and must-needed tools for the DIY’ers. You can keep it outside after your task. But can rubber hoses be left outside in winter?
In a word, the answer is no. You can store hoses outside when you drain all the water from your hose. You can quickly drain hoses by passing them through a higher point where gravity propels water out of the hose.
It ensures that your hose does not break when the sewage freezes. When there is still some water in your hose, it may freeze and cause damage.
Sometimes, icy and frozen water may break your hose. This article will discuss why you can’t leave rubber hoses outside in the winter and how to solve all those problems.
A Thorough Discussion: Can Rubber Hoses Be Left Outside in Winter?
As discussed overhead, don’t leave a hose out in winter. When you leave the hose outside, be aware that it may be damaged. The lowest temperatures are tough to tolerate in rubber hoses, particularly if they have water.
The most considerable risk is that the hose will tear, tear, or crack, which likely means it will need a repair or a brand new one. Now it’s time to explore how a rubber hose is damaged when left outside in winter.
What Happens if You Keep the Hose Outside in Winter?
If the hose is not disconnected and stored in the winter, the winter weather will damage it at freezing temperatures. Water tangled in the hose may rupture and leak the hoses. Winter temperature fluctuations can also burst the hose.
You can also leave your faucets outdoors by leaving your rubber hoses plugged in during winter. It leads to the icing of water pipes, leading to their rupture.
If you don’t disconnect the hose during winter, you have to act as soon as possible. Frozen water hoses can cause costly damage to the home.
At What Temperature Will Your Hose Freeze?
Since your rubber hoses aren’t protective against insulation or internal heat, they can freeze if the temperature drops below 32℉ for 6 hours. An icy night is sufficient to freeze the pipe and faucets.
Temperatures around 32℉ or lower for 6 hours will cause your pipe to freeze. Detach and store the hoses before freezing temperatures set in at night.
When the temperature drops below zero, the water hose is no longer needed. Therefore, it is ideal for storing your pipes when you notice the first frosts in the weather forecast.
When Should the Hose Be Disconnected in Winter?
If you dwell in an area with cold winters, disconnect the hoses before two weeks of average frost. Thus, early frost will not damage the hose or faucets.
Disconnect the hose and store it for two weeks until the first negative temperatures are reached. If your residence doesn’t get regular frosts, disconnect the hose as soon as your lawn begins to hibernate.
A mild winter’s cold and wet weather will shorten the pipe’s lifespan. You may keep the hose running for many years if you keep it for the winter.
How to Keep the Hose at Freezing Temperature?
Within minutes, you may easily save the hose for the winter. Yet, it is crucial to shut off the raw water supply simultaneously as the hoses are disconnected.
While disconnecting the hoses is vital in preventing external faucets from bursting, shutting off the water supply to exterior faucets is also essential.
Things You Need:
- Tubular strap (optional)
- Insulating faucet cover (optional but suggested)
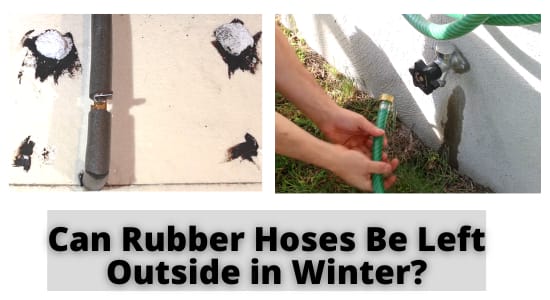
Step 1: Close-up of Outdoor Tap Water
Turn off the tap water outside. Most outdoor faucets contain separate valves in the house. Open the faucet to flow the rest of the water out through your hose.
Step 2: Disconnect Your Hose
During the winter, always disconnect your hose as it will remain attached to the faucet, causing the water to freeze at the connection and potentially damaging the hose.
Step 3: Drain Your Hose
Drain water and remove all equipment attached to your faucet and hose. Leave your garden hoses outside in cold temperatures if you don’t have any water inside.
To drain quickly, place the pipes on something high so gravity allows the water to flow through your hose. When your hoses are empty, temperature changes and repeated defrosting cycles can damage the hose and age the metal faster.
Step 4: Remove Spray Head
Terminate the spray head from the end of your hose. Drain the remaining water from the nozzle. Let the nozzle dry before reserving it.
Step 5: Disconnect Other Connected Pipes
If you get more than a hose, disconnect hoses of different lengths. Do it seriously.
Step 6: Wrap the Pipes
Wrap the rubber hose in large loops approximately for 2 feet. Inspect the wrapped pipe to make sure it is not kinked or pinched. Wrap the rubber hose separately.
Step 7: Secure the Wrapped Pipes
If you want, zip up the coil. Twist both ends of your hose together. It keeps the pipes clean in winter and discourages loosening of the hinges.
Step 8: Keep in a Dry Place
Install the hoses in a garage, shed, or other areas. The room must be dry before spring. Hang the hose in your shed or garage to protect it from extreme temperatures.
Use a hose hanger with a large surface to hold your hoses. Hanging them on the nail may bend due to the weight load.
Video Tips: 5 Tips to Avoid Frozen Pipes This Winter – DIY Plumbing
Final Verdict
Can rubber hoses be left outside in winter? I think you have got the answers.
Your climate plays a part in safely leaving your hose outside during winter. Also, you have to worry about UV protection, while extreme cold protection will be more critical. In cold conditions, you can always bury your rubber hose below the frost line.
Even in warmer weather, empty the hose after use. It is sometimes helpful to keep it in a hose with a hose swirl, making it more comfortable to drain.